Currently, Wi-Fi is a very common method of communication. It can be found anywhere: cafes, airports, shops, our homes. In our life we must know how to connect to Wi-Fi on your Mac®.
Note. First, make sure that the Wi-Fi is enabled on the laptop.
On your Mac, you can use the icon of the Wi-Fi menu to quickly connect to the nearest wireless network. If you don’t see that the Wi-Fi menu, you can connect using the network settings.
By the menu
Click the Wi-Fi icon in the menu. If Wi-Fi is off, select “Turn Wi-Fi on”. Then select from the list the name (SSID) of the Wi-Fi network to which you want to connect.
![]()
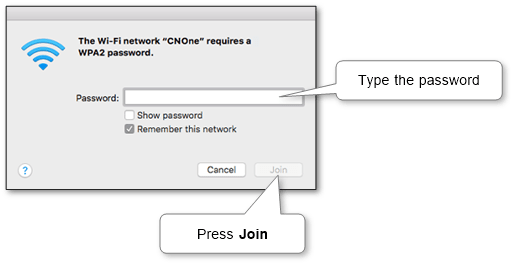
If necessary, enter the password from Wi-Fi and click “Join“.

Note. Check the box “Remember this network” if you want your Mac computer to connect to this Wi-Fi network automatically when the computer is in the visibility range of it.
By network settings
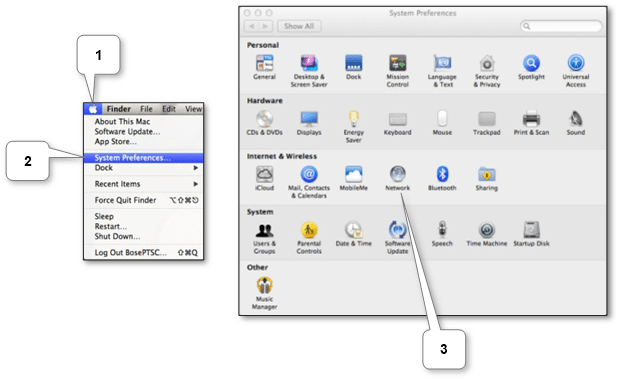
If you don’t see that in the menu there is an icon Wi-Fi, you can connect using the “Network” panel of system settings.

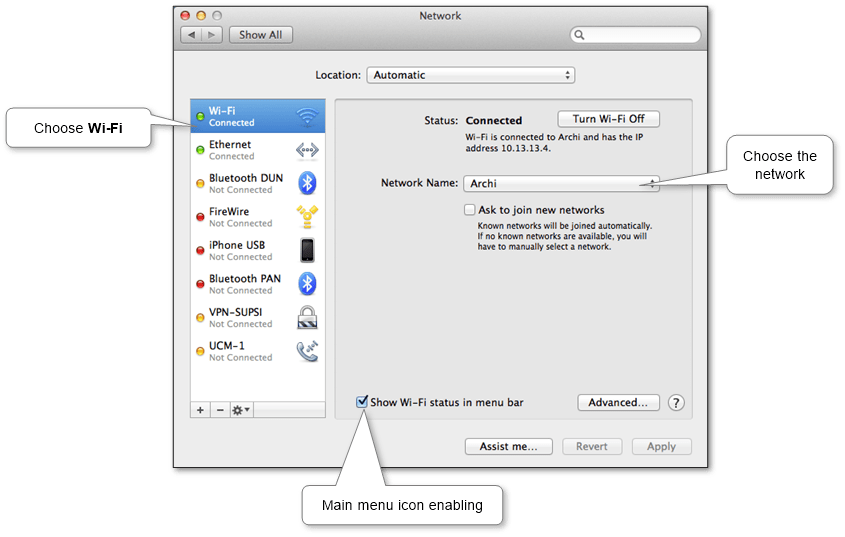
Select Wi-Fi from the left pane, click “Network Name” and from the drop-down list, select the name of the Wi-Fi network to which you want to connect. Also, here you can enable and disable the Wi-Fi menu icon.

If necessary, enter the password from Wi-Fi and click “Join“.

If something is wrong, you can try to find the answer on the official support website of Apple.
More information can be discovered in the original post about How to connect laptop, netbook or PC to Wi-Fi on Mac and on the main site.
Comments
Post a Comment